Deploy ionic projects in Linode VPS
Choose Linode as my cloud hosting provider
Linode is a Cloud Hosting provide high performance SSD Linux VPS. I choose Linode because of the stability of its services.
Sign up
Visit my referral link to create an Linode account. Don’t forget to use promo code LINODE10 to get $10 sign up credit.
Select plan
Sign in and select a Linode plan and data center, as shown below.
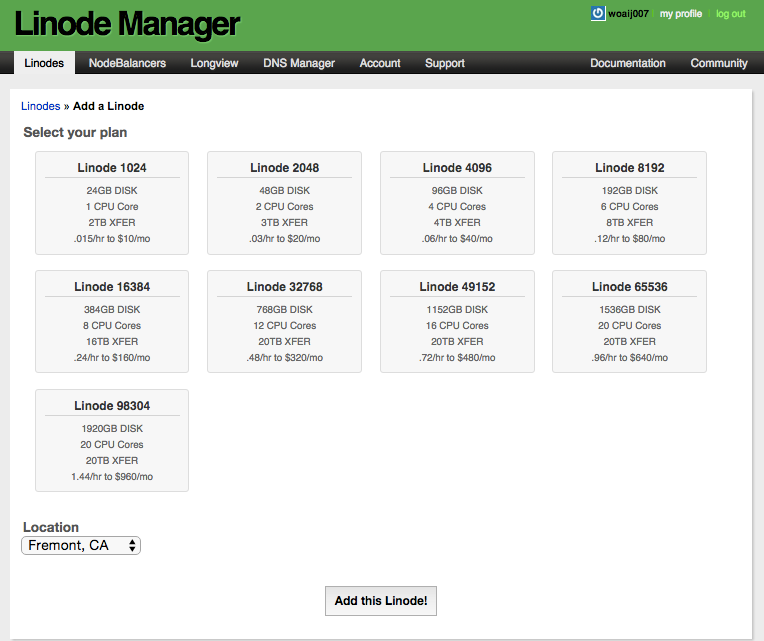
Usually you should select the data center closest to you to get best performance. If you are not sure which one to select, download the speed test to find the location for you. I choose the first $10/mo plan, it’s enough for me now and you can upgrade to an higher plan at any time.
Deploy Ubuntu
Get to Linode Manager and select your new Linode. Click Deploy an Image and you’ll be prompted to deploy a Linux distribution, as shown below.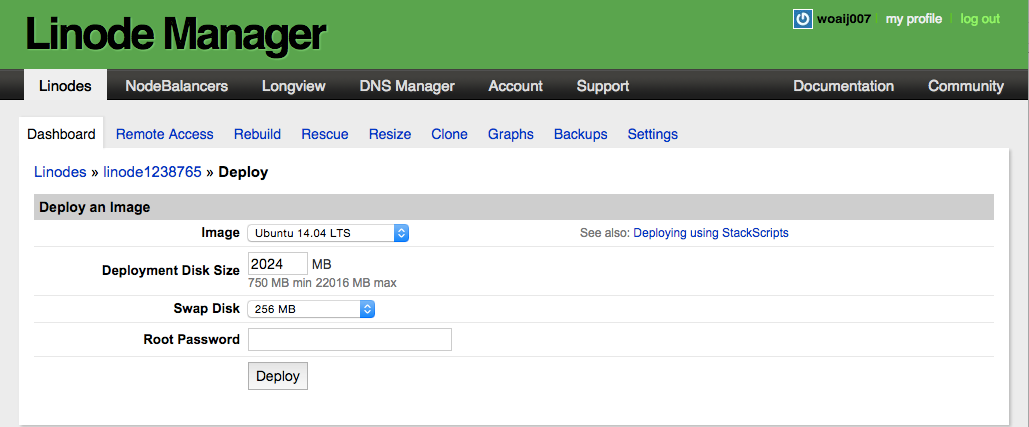
Select Ubuntu 14.04 LTS in Distribution, enter a size for the disk in the Deployment Disk Size, you can change disk size later, leave the default size of Swap Disk, enter your own Root Password and click Deploy.
Boot Your Linode
After you deployed Ubuntu in your Linode VPS, it’s still turned off. You need to log into the Linode Manager select your Linode and click the Boot button on your Linode dashboard.
Connect to Linode
Now your Linode is fully provisioned and available in the data center and it’s already turned on. So what we need to do is to connect to our Linode using SSH protocol.
Find the IP Address
Go to Linode Manager page, select your Linode and click the Remote Access tab. You will see your Public IPs as below.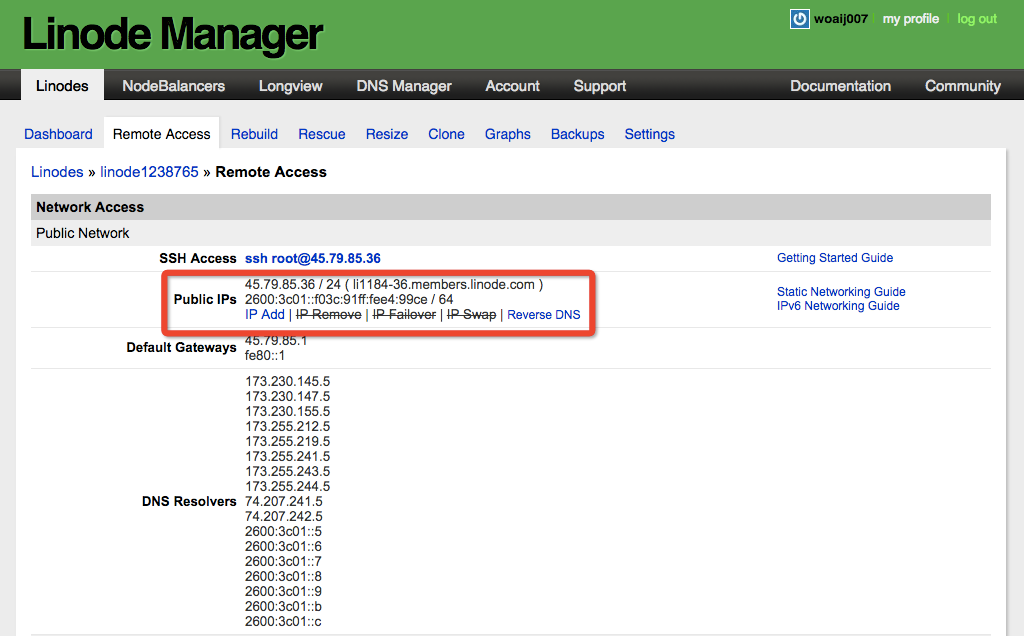
Log in using SSH
1 | $ ssh root@45.79.85.36 |
For your first time logging in, you need to type yes and press Enter to continue connecting after terminal showing a authenticity warning. After that enter the password you created for the root when you deplyed the Ubuntu.
Set the Hostname
A hostname is a nickname of your Ubuntu system and we need to set this up first.
1 | # echo "hostname" > /etc/hostname |
Enter the above command to set the hostname, replacing hostname in
double quotation marks with your own hostname.
1 | # nano /etc/hosts |
Use above nano command to open /etc/hosts file and add line 45.79.85.36 Huahua into file and save it. Huahua is my hostname, you should replace it with your own hostname.
Set the Timezone
1 | # dpkg-reconfigure tzdata |
This command let you access to the timezone setting interface. Check the current system date and time using following command:
1 | # date |
Watch below video for details about setting your system’s hostname and timezone
Install Software Updates
In order to patch security holes in packages and help protect your Linode against unauthorized access, you need to install the available software updates for your Linode’s Linux distribution.
1 | # apt-get update |
Install nodejs in Ubuntu
We need to install nodejs in Ubuntu so that we can run ionic project in our Linode VPS.
Setup nodejs source in Ubuntu
Add a PPA maintained by NodeSource. The PPA will be added to your configuration and your local package cache will be updated automatically.
1 | # curl --silent --location https://deb.nodesource.com/setup_0.12 | sudo bash - |
Install nodejs
1 | # sudo apt-get install --yes nodejs |
Install build tools
Used to compile and install native addons from npm
1 | # apt-get install --yes build-essential |
Check nodejs version
Check nodejs version to make sure you have it installed
1 | # nodejs -v |
Get your First Ionic Project
After you have installed Node.js, we are almost there for our first Ionic app.
Install Cordova
1 | # sudo npm install -g cordova |
Install Ionic
1 | # sudo npm install -g ionic |
Create ionic test project
1 | # ionic start ionic_test |
Start ionic serve
1 | # cd ionic_serve |
Now I am good to access to my first ionic project within browsers by typing 45.79.85.36:8100.
Actually if you want to keep your Ionic project online even after you disconnect the SSH, you should run the following command to start Ionic serve. Good luck, have fun!
1 | # screen -d -m -L ionic serve --nolivereload |
