Start ionic with API Demo
Today I am going to build my first ionic project with Instagram API. Because it’s easier to just get data from API rather than SQLite or local storage.
Create a blank Ionic project
Install Ionic
Ionic is a framework based on Node.js. Make sure you already have installed Node.js.
1 | $ npm install -g cordova ionic |
Follow the Android and iOS platform guides to install platform dependencies you need.
Start a project
1 | $ ionic start myApp blank |
Ionic provide ready-made app templates as tabs and sidemenu, here I just started a blank one.
Run your app
1 | $ cd myApp |
Here I just run the app use Cordova directly. Later in another article I will write how to build an iOS app using Ionic.
Visit localhost:8100, you can see the page as below. In chrome browser you can use Device Mode & Mobile Emulation to make the web just like an app in iPhone 6.![]()
Get Instagram API
In order to use Instagram API in our app, we need to learn how to use it first.
Register Your Application
Visit API - Instagram and log in with your Instagram account. If you don’t have one yet, download Instagram app from App Store or Google Play store in your cellphone and create a new account.
After you logged in to API - Instagram, you need to clike Register Your Application to register. After you done, you will get to a page like below, where you can get the information needed to get access_token for your API request.
Use API Console
Click the API Console side bar to test making request to Instagram API. Select Service to GET users/{user-id}/media/recent and Authentication to OAuth 2. This API let you access to an Instagram user’s recent media posts by its user-id.
For example, I want to know Taylor Swift’s recent posts. I will go Lookup Your Instagram User ID page, type in taylorswift, which is Taylor Swift’s Instagram user name to get her user-id is 11830955 as below.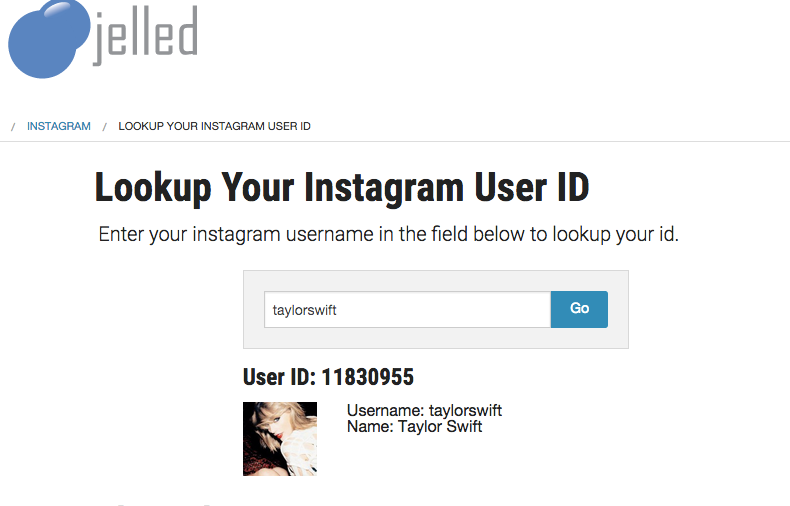
Back to API Console, click Template, input the user-id, and click Send. We will see our request and response as below.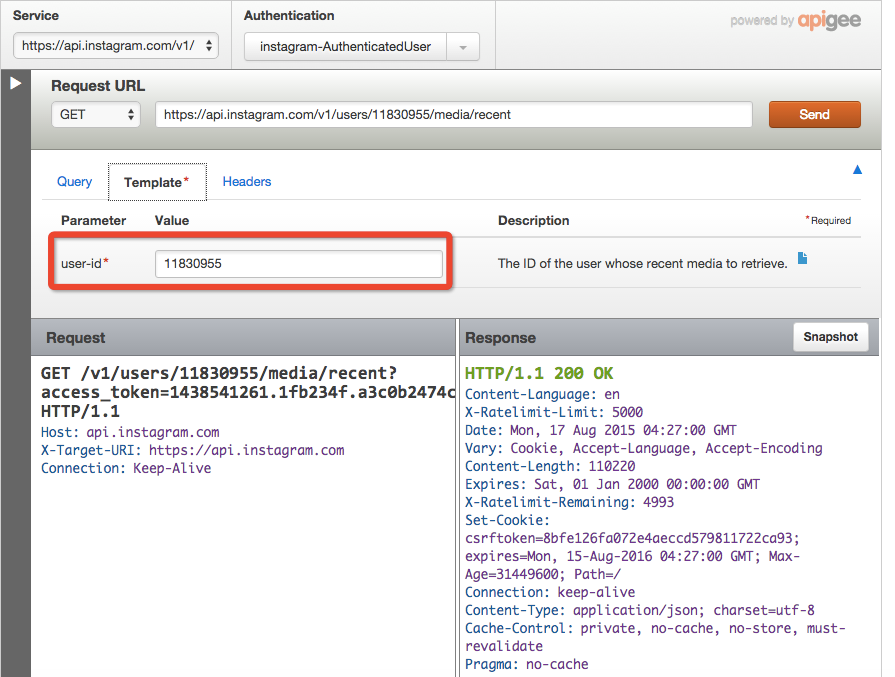
Here we get the whole request is
1 | https://api.instagram.com/v1/users/11830955/media/recent?access_token=1438541261.1fb234f.a3c0b2474c3447b2b3ecdbcd97244ac6 |
Now we are good to use this in our Ionic app.
Build the API demo
Use Card Images CSS
Ionic has many CSS components on CSS Components. Here we choose Card Images to show Taylor Swift’s recent Instagram posts in our app.
Copy the following code into ‘/myApp/www/index.html’ between <ion-content> and </ion-content>.
1 | <div class="list card"> |
Run the app, and you will get: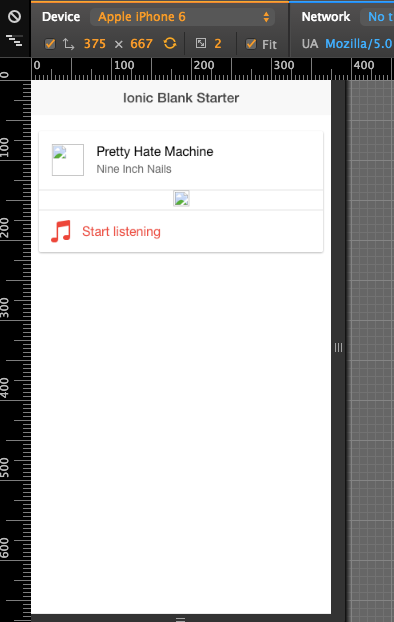
Get information from API
Now we need to get information from Taylor Swift’s Instagram.
In /myApp/www/js/app.js, make change of line
1 | angular.module('starter', ['ionic']) |
to be
1 | var myapp = angular.module('starter', ['ionic']) |
and add a controller named ApiCtrl by adding following codes:
1 | myapp.controller('ApiCtrl',function($scope, $http, $q) { |
In index.html, add control by changing
1 | <ion-content> |
to
1 | <ion-content ng-controller="ApiCtrl"> |
meaning in this content part, we will use data from ApiCtrl controller.
Run the app, we can get res as follow in chrome developer mode’s Console tag.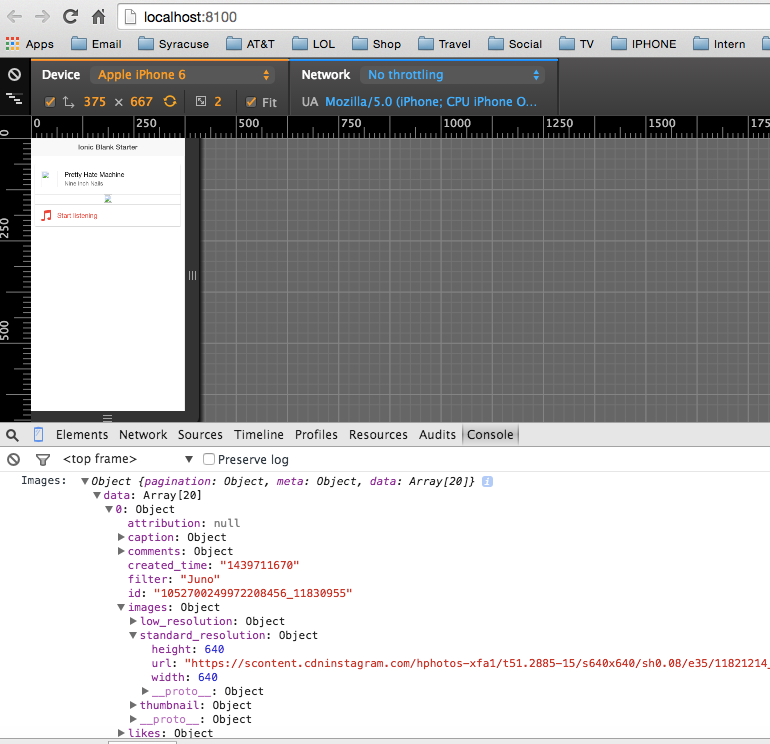
This is because we have line
1 | console.log('Images: ',res) |
in our controller to store the response from our API request as a json string.
Put data in our UI
Now we can sort the data we need from Images and put them in the right place of our app’s user interface.
1 | <body ng-app="starter"> |
Here I changed the page title to Taylor Swift's Instagram and created a list to show all recent posts (actually it’s 20 posts), each with a link to visit the original Instagram post.
Run the app, and it’s working!
